Manager Dashboard
After logging in you will get to the dashboard and see the overview of your keywaa®-IDs.
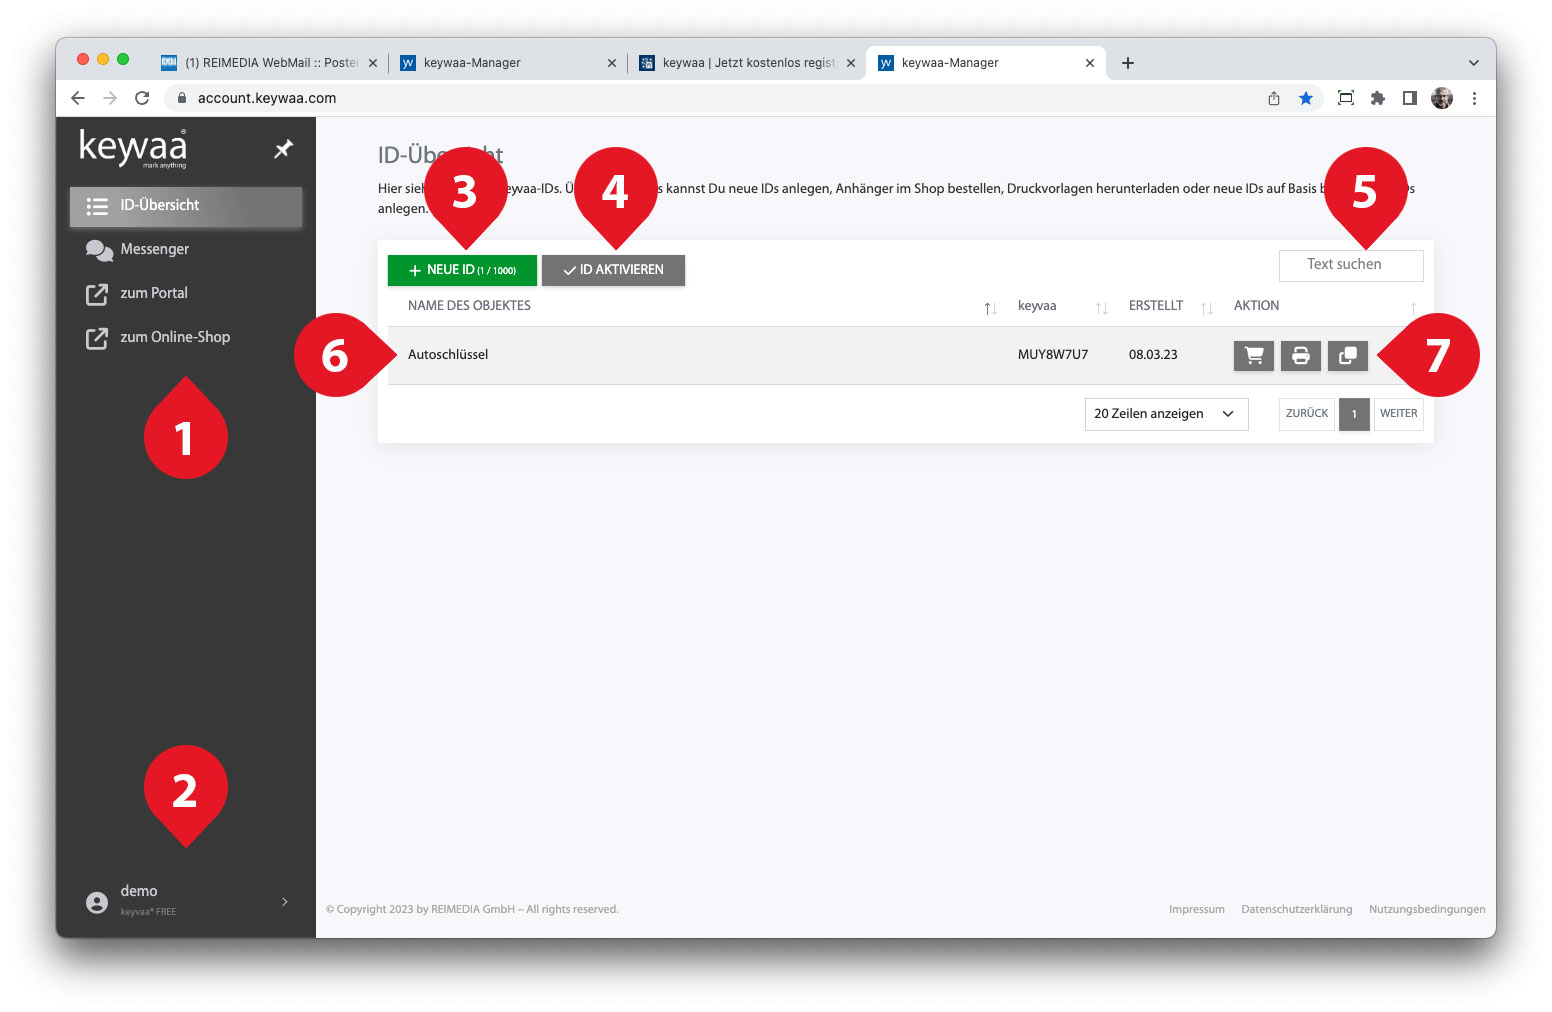
- Menu
The menu takes you to the ID overview, messenger, portal and online store. Use the pin to minimize and maximize the menu. - Profile
You can use your profile to change your e-mail address and password, for example. - Create new ID
With the green button you can create new IDs. The number of free IDs within your tariff will be displayed small. - Activate ID
If you bought or got a keywaa®-Marker, you can activate it here. After that it will be available in your ID overview. - Search text
If you manage many keywaa®-IDs you can search for a desired ID here. - ID line
Here all IDs are listed line by line. If you use keywaa®-Groups, only the IDs of the selected group or all IDs that are not assigned to a group are displayed here. With a checkbox in the lower left corner you can display all IDs groups in the general view. - Function buttons
You can use the buttons to execute functions for the respective ID- Buy markers in the online store. The ID is transferred to the store and can be selected here in the ID assignment area. This prevents spelling mistakes during the manual transfer.
- Via the printer system you can display and download print templates according to the set app.
- Via the copy icon you can create a new ID based on the selected ID. All contents – except for the ID – are transferred to the input mask.